Christel
5/21/2014 01:19 | Hi - we just installed this webpart on a test server. Its hooked up and pointing to a calendar. When I try to use category colors by setting the category column equal to Cagegory and the Category Colors to "Meeting=green;Vacation=green;Sick=red;Holiday=Yellow". I get the Category Legend colored in but the actual entries in the body of the timeline remain blue. Aren't they suposed to change colors too?
Thanks. |
|
Juerg
5/21/2014 18:58 | Christel,
please make sure to enter the name of your "Category" column into the web part's "Category Column" setting. |
|
Sean K
6/3/2014 18:26 | I really like you solution and would like to use it for help with scheduling. The problem is though I could have multiple people on one job, ie in the "Group By" column there could be more than one person. I tried your solution and it simply made new entries for each of the multiple entries. Is there anyway for the system to read each person in the "Group By" and add it to there row instead of creating a new row each multiple there is? |
|
Juerg
6/4/2014 13:11 | Sean,
we have now fixed the problem when assigning multiple users to the �Group By� column, eg. the event is now added to each of the assigned users:
Example:
the event for June 12 is a single item assigned to 3 users:
Please re-download the Timeline Web Part, extract the WSP file and then update the web part solution. |
|
Dan
7/21/2014 18:33 | We are currently configuring this webpart for our company intranet and we ran into an issue while setting up colors for events. We have a column called status with choices: pending, accepted, and rejected. I used the category colors field to set pending to orange, accepted to green, and declined to red. The colors for the legend are all correct but in the month and week webpart views the color for accepted is displaying as blue. The colors for pending and declined are displaying correctly, though. Do you know of a fix for this issue? Thank you for your time! |
|
Juerg
7/22/2014 14:26 | Dan,
there is most probably a typo in the web part�s �Category Colors� setting:
pending=orange;accepted=green;rejected=red
(eg. it does not exactly match the corresponding �accepted� choice as defined in the list column). |
|
Dan
7/22/2014 14:56 | Juerg, I had thought that as well, but the "Category Colors" setting does not have any typos in it. Also, I should have mentioned this in my first post, but the legend is displaying the correct colors, including the green for accepted, but when it is displaying the events on the timeline, all colors still work except the color for "Accepted." Any thoughts? |
|
Dan
7/22/2014 15:24 | That did the trick, Juerg. Thank you! |
|
Luis Diego Barrientos
10/3/2014 18:58 | Is there a way to show all the resources even if they do not have appointmens???? |
|
Juerg
10/6/2014 10:19 | Luis,
the web part only returns users/resources that have at least one appointment during the month.
You thus could set up a recurring appointment for each resource (once per month on every first day of the month at say 2am to 3am). This will ensure that these resources are always displayed. |
|
Luis Diego
10/23/2014 22:47 | Thanks for your answer Juerg, We have another issue the webpart buttons they do not look like the picture, loaded with an image of an X. We are very interested on this WP but this would be a problem. |
|
Juerg
10/27/2014 11:47 | Luis,
this is caused by a bug in Sharepoint 2013 when using Internet Explorer.
We have now fixed thiis problem, so you can re-download and then update the web part. |
|
Jeanne Conde
2/3/2015 21:09 | Can this be used with a task list similar to the OOTB timeline web part |
|
Juerg
2/4/2015 19:15 | Jeanne,
the most recent version actually can be pointed at a SharePoint task list:
|
|
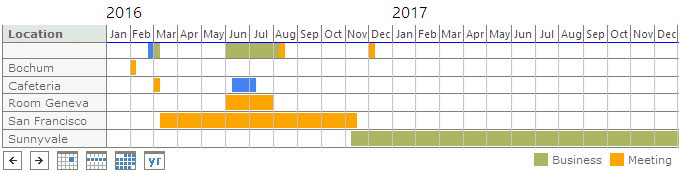
Darryl
3/30/2015 22:24 | Juerg, we're interested in using this to show progress on project timelines, rather than appointments. Is there an option to scale it over a longer period (even 5 years) rather than day/week/month? |
|
Juerg
3/31/2015 12:02 | Darryl,
although the web part can be pointed at a Sharpeoint Task list, there is currently no option for a �year� or a �5 years� view. |
|
Andre R
9/30/2015 15:00 | Hi,
in our office365 i made a tasklist and i see the task in the timeline but no name ... how can i let this showup. |
|
Juerg
9/30/2015 16:32 | Andre,
please just enter Title into the web part�s �Group By� setting. |
|
Luis Diego Barrientos
4/20/2016 18:52 | Hi Juerg, is there a way to force the timeline to render a specified week?
Thanks for your help. |
|
Juerg
4/20/2016 19:26 | Luis,
you can pass in the desired date either via the �date� URL parameter or via a connected Filter web part.
If this does not suit your needs, how exactly would you want to specify the week to be displayed ? |
|
Frank
4/29/2016 07:41 | In March last year, you replied to Darryl saying "there is currently no option to scale over a longer period". Does this mean one is in the works? I am trying to create a page showing a roadmap of products becoming available, moving to end of life, going out of support, and this webpart is perfect except that it doesn't do quarters across the top of page with a three year time period, with products listed down the page. the "Timeline" display is perfect except that it doesn't do a large enough scale |
|
Juerg
4/29/2016 20:12 | Frank,
we actually plan to include this option in the web part�s next major release (due in about 2 months). |
|
Michael
6/7/2016 22:12 | Is there a way to change the Calendar "start" day of the week from Sunday to a different day for each entry? I'd like to build an "On-Call" calendar but the rotation needs to be dynamic for each entry. Some people could rotate weekly on Sunday while others may wish to rotate Wednesday to Wednesday. I'm using the Recurrence and Weekly options and selecting every day of the week to represent that weekly rotation. Thank you. |
|
Michael
6/7/2016 22:50 | Can I change the recurrence day of week to a different day of the week for each entry? |
|
Juerg
6/14/2016 19:44 | Mike,
do I correctly understand that you just would like to be able to display the web part�s �Week� view starting on a weekday that can freely be chosen via the configuration (eg. overriding the Monday through Sunday default sequence) ? |
|
Michael
7/19/2016 23:46 | Sorry, I was pulled away on another project and just now following back up with my post. I was trying to do something with the Calendar and the Recurrence option. I want to recur every day of the week, but start that recurrence on say Wednesday instead of Sunday, so it will go Wednesday to Wednesday. And when I select the Weekly option and recurring every X weeks I want it starting on Wednesday. I want the start day of my choice if I select every day of the week. |
|
Juerg
7/20/2016 14:40 | Michael,
are you referring to setting up a recurring calendar event from within the �Timeline� web part or from within a Sharepoint calendar ? |
|
Gayle
8/24/2016 04:38 | Hi Juerg
Is there likely to be a 2016 version of this.
Thanks |
|
Juerg
8/24/2016 12:15 | Gayle,
we have now published the 2016 version. |
|
Miriam
9/8/2016 15:05 | Hi Juerg,
I'm facing the same issue like Christel and Dan: My Category Colors don't change in the timeline even though the legend do change. I tried deleting all Cookies etc. but it's just not working. Can you help me please? |
|
Juerg
9/8/2016 19:13 | Miriam,
the legend always displays the labels and colors as entered into the web part�s �Category Colors� setting, but if it cannot match the label with the corresponding �Category� choice value, it will display the item using the default blue color.
Can you indicate:
- The value entered into the �Category Colors� setting
- The choice values of your �Category� column (List Settings/Columns/Category)
|
|
Frank
2/15/2017 13:40 | Is there any way to connect this to a filter web part such that selecting a list name from a dropdown in the filter will populate the list name used to build the timeline, as is done for the "AE List Search" web part?
I have a list of projects, and the names of the tasks lists which are associated with each project. There is then a calculated link that goes to a "Tasks" page to display the contents of the tasks list (it's done this way in order to allow each "Tasks" list to sync with an MS project plan. It looks useful as it stands, but it would be more informative if it were to possible to link a "TimeLine" display to the list, running across the head of the list of tasks. |
|
Juerg
2/15/2017 14:35 | Frank,
we have now added the new option to pass in either the �List Name� or the �View Name� via a filter connection or an URL parameter as illustrated below:
Filter connection:
List Name=[filter]
or
View Name=[filter]
URL parameter:
List Name=[Project]
or
View Name=[Project]
(where �Project� in the above example would be the name of the URL parameter).
Please re-download the Timeline Web Part, extract the WSP file and then update the web part solution. |
|
George
5/13/2017 01:12 | We just installed the most current version of the TimeLine web part last week and it is working mostly as expected. But I am encountering a bug where certain random timeline entries do not appear in the timeline calendar. I have tried both a calendar and a task list and both exhibit the same behaviour (i.e. the exact same items are missing). It's not a "colour" issue as the pointer does not indicate a link when hovering over where the date where the item should exist. There is also no pattern to the behaviour as the missing items are not specific to just one category or a particular "Group By" item. Thanks, George |
|
Juerg
5/18/2017 13:47 | George,
we were able to locate and fix the issue (it affected all entries that started on day 28 or later of the month when using the web part's "Year" view).
Please re-download the Timeline Web Part, extract the WSP file and then update the web part solution. |
|
George
5/25/2017 02:53 | Hello. We are using the most current version of the timeline webpart with SP2013 foundation. The webpart works fine for situations where a specific date is chosen such as a scheduled meeting during regular work hours. But we are using it for a task list that only requires a start and end date. We don't specify a start time or end time so the default time is always 12:00 am. Unfortunately, the webpart interprets 12:00 am as the previous day so both the start date and end date appear one day earlier in the timeline grid. Ideally, we would like the timeline to treat the specified start date and end date as "all day events" so it fills up all cells for the whole period including the start and end dates when seen in the month view. Is there an option available for this situation? Thanks, George |
|
Juerg
5/26/2017 12:19 | George,
we have now added the new �includeenddate� option (to be added to the web part�s �Options� setting) which includes the day of the end date:
includeenddate=1
Please re-download the Timeline Web Part, extract the WSP file and then update the web part solution. |
|
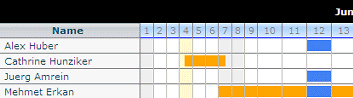
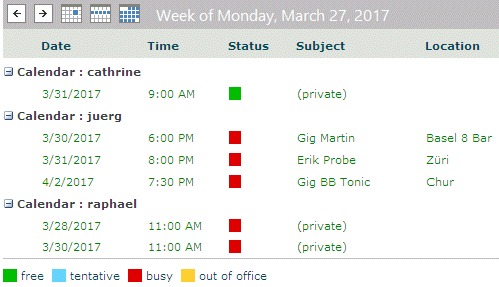
Mike Zz
8/16/2017 22:37 | I noticed in your screenshot from 2/4/2015 19:15 that there is a person's name but they have no items. I see the same thing in my application where even if I set the web part to show a week by default, it lists all the groups even if they don't have any item in the current week.
However, if I scroll to the next month, it shows rows for groups that have actual items in that month.
Is there a way to have it hide empty rows? In our case we have to use the Title for a vacation calendar for a large group so 75% of the screen is empty rows creating lot of clutter.
Thanks! |
|
Juerg
8/17/2017 18:17 | Mike,
we have now added the new �Hide Empty Rows� web part setting to suppress the rows with no events within the selected time period.
Please re-download the Timeline Web Part, extract the WSP file and then update the web part solution. |
|
MikeZz
11/30/2017 16:43 | Just to be sure I understand about the Property Filter, in the latest version I can just pass a URL parameter and the Timeline web part automatically picks that up on it's own without any special settings or query string URL web part.
|
|
Juerg
12/1/2017 14:25 | Mike,
please just make sure to embed the URL parameter(s) into the "Property Filter" expression enclosed in curly braces as illustrated in the below example:
Category='{yourURLParameter}' |
|
MikeZz
12/1/2017 19:53 | I noticed when I set the query string in the web part that it works. Although if I do not pass any filter it shows nothing.
Is there a way to define the filter properties on the web part but have the web part NOT apply a filter if there is no query string in the URL?
THanks
Mike |
|
Juerg
12/3/2017 15:56 | Mike,
we have now added the option to not apply the �property� filter if no URL parameter is being passed in.
Please re-download the Timeline Web Part, extract the WSP file and then update the web part solution.
Please then also use the below Property Filter expression:
Category='{yourURLParameter}' OR '{yourURLParameter}'='' |
|
Astrid
1/19/2018 21:19 | Hello,
While hovering over the event itself displays the title and more information, we were wondering whether it would be possible to have the title of an event display over the category color if that makes sense?
Thanks! |
|
Juerg
1/21/2018 14:25 | Astrid,
you can actually display the the event title within the bar by adding the below tot the web part�s �Options� setting:
showinfo=1
|
|
Diego Barrientos
6/6/2018 16:19 | Hello,
We're experiencing some issue when placing two webparts connected to the same list but grouping the data differently and whit different views.
If we have the month view it shows data but when changing to the year view the webpart shows nothing.
In other webpart in the month view it shows the data correctly but when we change to year view it only shows the current month data even if we have the entire year reserved in the calendar.
Any idea? |
|
Juerg
6/20/2018 14:55 | Diego,
please make sure that the view entered into the "View Name" setting is NOT based on the �Calendar� view template (eg. based on the �All Events� view).
The Sharepoint calendar views actually add a �DateRangesOverlap� clause to the CAML expression which conflicts with the web part�s CAML.
We�ll fix this issue in the web part�s next release (so that you will be able to use a calendar based view). |
|
MikeZz
7/16/2018 18:30 | Hi,
Is it possible to do the color groupings by a calculated column?
My customer is using a Choice column with LOTS of choices so we use a calculated column (text format) to create a Category Group. And its that group that we want to do the color categorizing by.
Thanks |
|
MikeZz
7/16/2018 18:34 | Cancel that last post :) I just realized that in my testing I was using the Display column name for the Category column instead of static name. Works fine! |
|
MikeZz
7/16/2018 19:14 | Another new question...
If our farm is in Chicago (UTC-6) and the user set up the site settings to be Madrid (UTC-6), the colored bars seem to show events shifted by one.
As an example, I have an non-All Day Event covering July 15 on the Timeline web part.
Hover Date shows:
12AM to 11:59PM
Start time on Display form: 2018-07-16T05:00:00Z
End time on Display form: 2018-07-17T04:59:00Z
Start time on Edit form: 2018-07-16, 12AM
End time on Edit form: 2018-07-16, 11:59PM
When I edit the item, do not change anything, then hit save, the web part reloads and shows the color bar on July 15.
When I refresh the page, it still shows on the 15th.
When I refresh the page a second time (no item change) it shows on the 16th.
This seems somewhat consistent that it shows the bar correct for a page load and then shows it incorrect.
Thanks for any help! |
|
MikeZz
7/23/2018 15:53 | We are using the out of the box calendar list and am grouping by the Attendees column. The static name of the column is actually ParticipantsPicker so that is what shows up above the list of people (groups). Is there a way to have it show the actual Title or just force a specific text to show up instead of the static name?
If it would require an additional call to get the title then make just have a text over-ride so performance isn't impacted.
Thanks
MikeZz |
|
Juerg
7/24/2018 17:26 | Mark,
you can override the column header of the first (�group�) column via the web part�s �Localization� setting.
In your case please enter:
Attendees;Week of;all day;Add new item
(eg. the first term in the above setting sets the column header text). |
|
MikeZz
7/24/2018 18:00 | Works like a charm. Thanks! |
|
Juerg
7/24/2018 18:15 | Mike,
is the calendar addressed by the Timeline web part located in the site which uses the �Madrid (UTC-6)� time zone or in a site using the �Chicago� time zone ? |
|
Geralt
1/17/2020 18:12 | Hello,
a few questions
- is it possible to start the week on a Sunday, for example, in the week view?
- can we choose what gets displayed when hovering over timeline bars?
- is it possible to display text inside timeline bars, but only for specific types of events given by the Category column?
- is dynamic labelling of the web part available? Say I want to display today's date or some other dynamic formula under the timeline, for example?
Thanks |
|
Juerg
1/20/2020 18:04 | Geralt,
- First day of week: it is currently not possible to start the week view on Sunday
- Tooltips: you can define your custom tooltip template via the web part's "Tooltip" setting by embedding the column names enclosed in curly braces as eg:
{Author};{EventDate};{EndDate};{Title};{Location};{Description}
(please insert line breaks using the ";" character).
- The inline test (set via the "showinfo=1" option) currently can only be set unconditionally.
- the "Footer" setting currently supports the "{date}" and "{time}" placeholders to inject the current date and/or time of day.
|
|
Jan Kr�tk�
2/14/2020 10:42 | Hello,
is ti possible to select a different column to show in the bar using showinfo=1?
Thank you Jan |
|
Juerg
2/14/2020 15:21 | Jan,
we have now added the new �infocolumn� option (to be added to the web part�s �Options� setting) to allow you to specify a custom column in combination with the �showinfo� option:
showinfo=1|infocolumn=yourCustomColumn
Please re-download the Timeline Web Part , extract the WSP file and then update the web part solution. |
|
Danny
3/27/2020 14:16 | This is a really great webpart guys
Just configuring now. Is there a way to change the colour scheme used?
I'd like to blend it in with the our intranets color scheme |
|
Juerg
3/27/2020 14:55 | Danny,
all the web part elements expose CSS class names to let you override the default styles.
You can add the CSS styles via the web part's "Options" setting as illustrated below:
css=.AETLheader {background-color:red} .AETLcaption {background-color:dodgerblue}
The above example sets the background color for both the header area ("black" by default) and the date column headers (default "light blue" by default). |
|
Danny
3/30/2020 13:53 | Thanks Jeurg
although i am pasting the following into the options field with no luck...
css=.AETLheader {background-color:teal} .AETLcaption {background-color:grey}
any ideas |
|
Juerg
3/30/2020 15:59 | Danny,
sorry, I forgot to mention that you need to use the "!important" qualifier:
css=.AETLheader {background-color:teal !important} .AETLcaption {background-color:grey !important} |
|
Olga
5/23/2020 03:25 | Hi-This WP looks fantastic! Do you have the Time Line web part available for SharePoint online.
If so, can you tell me how to get it.
Thank you |
|
Juerg
5/25/2020 11:24 | Olga,
the Timeline web part is currently not available for Sharepoint Online. |
|
Rim K
7/24/2020 00:23 | Hi,
Is there a way to change the text color inside the timeline bars that's displayed by showinfo=1?
Also could you tell me more about the infocolumn option? I'm not sure I got that part...
thanks! |
|
Juerg
7/27/2020 12:28 | Rim,
you can change the info text color by addressing the "AETLinfo" CSS class. You can actually set it via the web part's "Options" setting as illustrated below:
showinfo=1|infocolumn=yourCustomColumn|css=.AETLinfo {color:red}
The "infocolumn" option is used to display the value of the corresponding calendar column (as opposed to the default "Title" column). |
|
Timeline web part on SP 2019 Modern Pages
7/23/2021 22:20 | Hi - I just installed the web part on our SharePoint online tenant and added the web part to a modern page. When I configure it per the instrucctions on your site, the message displays "Sorry, something went wrong"
Here are the configuration parameters;
Web Part = AETimeline
Configuration = list=TeamCalendar
groupby=Attendees (person field)
category=Category
colors=Remote=yellow;Vacation=gray
Any idea why it isn't working?
Thanks. |
|
Juerg
7/26/2021 19:39 | please note that the web part is compatible with SP 2019 "modern" pages, but not with Office 365/SharePoint Online. |


 Very happy with the level of service and level of professionalism of Juerg Amrein and his team.


 Web Part Installation Instructions
 Post a Comment